| ||||||||||
 

Dr. Ronald P. Rogers CHIROPRACTOR Support for your body's natural healing capabilities 270-384-5554 Click here for details 


Columbia Gas Dept. GAS LEAK or GAS SMELL Contact Numbers 24 hrs/ 365 days 270-384-2006 or 9-1-1 Call before you dig 
Visit ColumbiaMagazine's Directory of Churches Addresses, times, phone numbers and more for churches in Adair County Find Great Stuff in ColumbiaMagazine's Classified Ads Antiques, Help Wanted, Autos, Real Estate, Legal Notices, More... 


|
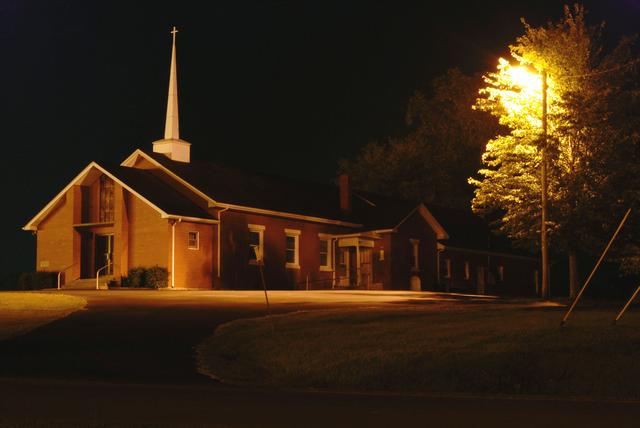
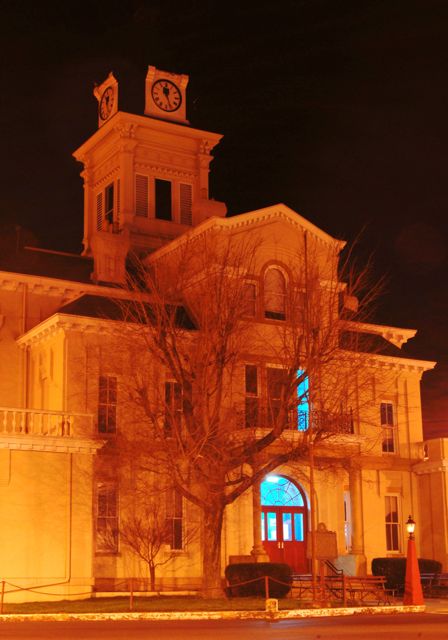
Night Photography 101: Techniques, Camera Settings, and Stuff This is Night Photography 101: 4th Installment: Techniques, Camera Settings, and Stuff The next earlier installment is Planning a shooting schedule; on location By John E. Moss Jamestown, Russell Co., KY I will always remember my first attempt at a night photography. The excitement and challenge of pulling an image from the clutches of a great darkness. The planning hadn't taken long since I was familiar with the location even to the point of going there during the day and finding a parking spot that could easily be found in the dark. My small camera bag was packed with the essentials and the tripod was in the car waiting. I had even waked up before the alarm clock announced it was time to get at it. A day that was filled with great anticipation and possibler reward had begun. My first night photograph was in my estimation fairly good though it was all new to me. As I would freely admit when pressed on the matter, I was literally feeling around in the dark. Yeah, I had done fairly good, so I thought, but then I didn't know any better. With my entry level 'smart' digital camera set on Automatic, and braving a cold hazy three-thirty morning, I did get an image that was recognizable. Fortunately soon afterwards, I showed the image to a friend who knew better. He proceeded to diplomatically guide me in the right direction. I quickly realized how fortunate I was at the time. The photograph was somewhat presentable, but lacked sharpness, and especially clarity I didn't know it but my friend had been a professional photographer for a long time. After numerous years he had gotten burned out on the standard boilerplate weddings and portraits trade. A career change afforded him the opportunity to eat regularly and photograph his desires and interests. Fortunately for me his interest and specialty was long exposure night photography. The gallery of night photographs he carried on his IPod was impressive indeed. The photographs gave me a hunger to learn more. Contemplating my newly created frames in a different light, I realized how diplomatic my friend was when looking at my work. The photograph was somewhat presentable but lacked sharpness and especially clarity that comes from depth of field. There were no distinguishable sharp edges, or details in the image. It was all a soft blur of color, light and shadow. The image was for the most part pleasing to the eye, but quite forgettable as an accomplishment. I was fortunate to have a friend who when questioned helped me out with equipment advice and information. I took everything he said and researched it to the tenth degree. Following several professional photographers, I studied their online work and methods. It didn't take long to realize my limitations, and make workable adjustments. Not everyone can afford excessively expensive equipment in abundance and have five or six interns working for bean soup wages. Fortunately in most cases, we can produce outstanding photographs by just adding a little more time to the exposure. For the most part, most nonprofessional photographers with a day job or retired are going to be shooting with what is called 'kit lens' and a camera in the eight hundred dollar plus or a lot minus range. Since not many of us can afford a six thousand dollar Nikon or equivalent f/2 200 mm lens used for low light sports events or amazing night photographs, we have to make adjustments with what we have or can afford to purchase. Fortunately in most cases excluding night sports, we can produce outstanding photographs by just adding a little more time to the exposure. I would say ninety-nine percent of my long exposure night photographs have been made with the standard 18-55 mm kit lens that came with the camera. It is a very serviceable lens and since nothing hopefully moves during a night shoot, its light gathering abilities are not to much of a problem factor. Very, very seldom have I run into a situation where the long glass was needed for a night photograph except for maybe where fences, deep drop-offs, and the unknown intentions of sharp-toothed critters were involved. I once was going to shoot a soft lighted distant tree line that had intrigued me for some time. A kind of moonlight tree line photograph instead of the commonplace early morning rising sun skyline frame. With the camera mounted on the tripod, I walked across the back road highway. I could barely see where I was stepping. This was serious darkness squared. With my first step off the asphalt, I heard a deep menacing guttural growl. It was not a warning growl, but a ready to mix-it-up anticipation growl that announced in the still night that "I am coming to get you, dinnertime." Needless to say, I retreated back across the road, changed glass with fumbling fingers and snap, snap got out of there. Unfortunately, the photograph didn't work out. I think in the several moments of panic I forgot to take the lens cap off. With the Manual setting, you will have control over both the Aperture setting and Shutter speed. In order to get away from that photograph of soft blur, color and light, you need to get away from the Auto (Auto) and Program (P) settings on the camera. You need to take control of the moment by putting it in Manual mode (M). With the Manual setting, you will have control over both the Aperture setting and Shutter speed. You also need to get that tripod out of the closet and get familiar with its workings. What you will be aiming at with your night photographs is a point where when you look close at your finished frame you can even make out the individual bricks on a building you shot from across the street. You are after clarity, and sharpness, and that comes from depth of field. The nice fuzzy backgrounds you get with portraits or those stunning closeups are not what you are after. Large aperture openings are not your friend when shooting at night. I shoot most if not all of my long exposure night photographs at a small aperture or lens opening setting of f/22. It is a very small opening in the lens. You can use f/16 or f/24, either will give you that clear frame sharpness that will make people oohs and aaaaah when they view your finished work. This is of course if you hit the timing, or shutter speed correctly. The small aperture setting means the lens will have to stay open longer to let in more light, which means you have to have the camera mounted on a steady tripod. These settings are far beyond hand held camera operations. After manually setting the aperture, you will need to address the shutter speed. Forget about looking to the camera for settings. After manually setting the aperture, you will need to address the shutter speed. Forget about looking to the camera for settings. They will be far too short of duration. This is long exposure photographs. Nikon has a setting known as Bulb, which when used will hold the shutter open for as long as the shutter button is pressed down. I am sure Canon and other manufacturers have similar settings. I don't know what they are called, but without doubt they are detailed in that manual you were supposed to read and carry with you. Set the shutter speed for Bulb or the equivalent depending on the manufacturer. With the camera set on the tripod, the lens opening set on f/22 or so, and the shutter set on Bulb or the equivalent, the next handy photographic item you pull from your over endowed camera bag is a wireless remote to operate the shutter. When you are taking photographs that require from thirty seconds up to eight minutes or more, you will not be able to stand there in the dark, counting off the seconds while holding the shutter button down. Fingers get tired and at the least you will unavoidably get camera shake and accidental short timed shots. Far too many things can happen while you are uncomfortably standing there in the dark counting or timing the frame and nearly all of them are not good. The wireless remote will be your friend simply because it stops camera shake by your shutter finger and frees your hands for other important things. It also lets you stay alert to your surroundings, and that is important. I time my over a minute shots with an Iphone. With the wireless remote, I open the shutter and start the timing clock. I then have the freedom to stretch my legs, drink my coffee, wander about, and have a free hand to cover the lens should car lights approach or unexpected company arrives with three hundred questions beginning with "What's That?". Believe me it happens. I have often thought of carrying a dozen donuts with me to distract the curious or throw at critters as dessert peace offerings. If you are out in the seriously dark boondocks, you better start your shutter timing at three minutes or more. When I get to my predetermined time for the frame, I press the button of the wireless remote for the second time and the shutter closes. If you are using noise reduction on your camera, normally the frame will pop up on the rear LCD screen after about the same time as the exposure took. It is at this time that you see the frame and know if you either hit it on the money or you have to add or subtract exposure time. Zoom in, look it over for detail, check it out and note your framing, and anything else you can think of at the time. If need be, add or subtract time and shoot again. Remember, you have a lot of time, sleep and expense invested in your location shoot. Digital frames are cheap, take a hundred of them. The one that could put a smile on your face for days on end might be number fifty-one of seventy-five. Normally, for a well lighted city street such as Jamestown's Monument Square, exposure times start around thirty seconds or so depending what building you are pointed at. Exposure times can be as short as six seconds or as long as forty-five seconds. When you move down to a location where the streetlights are far apart your exposure times increase to a minute or more. If you are out in the seriously dark boondocks, you better start your shutter timing at three minutes or more. A word to the wise, when you get that great photograph pop up on the LCD screen and you are dancing in circles and smiling like a mule eating briars because you hit it on the money, take two more insurance shots. Time the frames thirty seconds longer and thirty seconds shorter. In higher light conditions do ten or five seconds plus and minus. Surround what seems to be that great reputation making frame. Until you have learned how that LCD screen shows the photographs, take insurance frames. It can keep you from crying in your soup. Next Time: Night Photography 101 . . .5th Installment: A Few Tips to the Wise. And On One Shoot. This story was posted on 2010-03-21 03:17:25
Printable: this page is now automatically formatted for printing.
Have comments or corrections for this story? Use our contact form and let us know.
More articles from topic News:
(ADV) Please Send Yard Sales Now Bro. Dennis Roberts preaching at Flatwoods, March 21, 2010 From the Diner: No news on the wet-dry election Friends of Green River Lake organization becomes a reality Jacob Burton honored at IU Optometry White Coat Ceremony Public library employees receive scholarship Free tetanus vaccinations for farmers in Edmonton, KY List of Venues for Meetings grows: add Trabue-Russell House Good news: The prodigal Gavin the Dog has returned Baby So Soft campaign goal is 1,000 blankets View even more articles in topic News |
 

115 Jamestown St. Columbia, KY. 270-384-2496 


 Provided by the Adair Co Fiscal Court and the Adair Co. Emergency Mgt. Agency 


|
||||||||
|
| ||||||||||
|
Quick Links to Popular Features
Looking for a story or picture? Try our Photo Archive or our Stories Archive for all the information that's appeared on ColumbiaMagazine.com. | ||||||||||
|
Contact us: Columbia Magazine and columbiamagazine.com are published by Linda Waggener and Pen Waggener, PO Box 906, Columbia, KY 42728. Please use our contact page, or send questions about technical issues with this site to webmaster@columbiamagazine.com. All logos and trademarks used on this site are property of their respective owners. All comments remain the property and responsibility of their posters, all articles and photos remain the property of their creators, and all the rest is copyright 1995-Present by Columbia Magazine. Privacy policy: use of this site requires no sharing of information. Voluntarily shared information may be published and made available to the public on this site and/or stored electronically. Anonymous submissions will be subject to additional verification. Cookies are not required to use our site. However, if you have cookies enabled in your web browser, some of our advertisers may use cookies for interest-based advertising across multiple domains. For more information about third-party advertising, visit the NAI web privacy site.
| ||||||||||